
Machine Vision for Packaging: Inspection Tasks and Limits
What machine vision can check on a packaging line, what each task needs in samples, lighting and rejects, and where it cannot replace other tests.
Missed defects can escape inspection and false rejects waste good packs. Machine vision can check features that are visible to a camera, such as presence, label position, printed codes and the appearance of a seal area. It needs defined defects, representative samples and confirmed rejects, and it does not replace seal-integrity testing, metal detection or weight checks.
Applies to: Covers camera-based inspection stations on packaging lines for tasks such as presence, label position, code reading and appearance. It does not cover specific camera selection, software configuration or validation for regulated products.
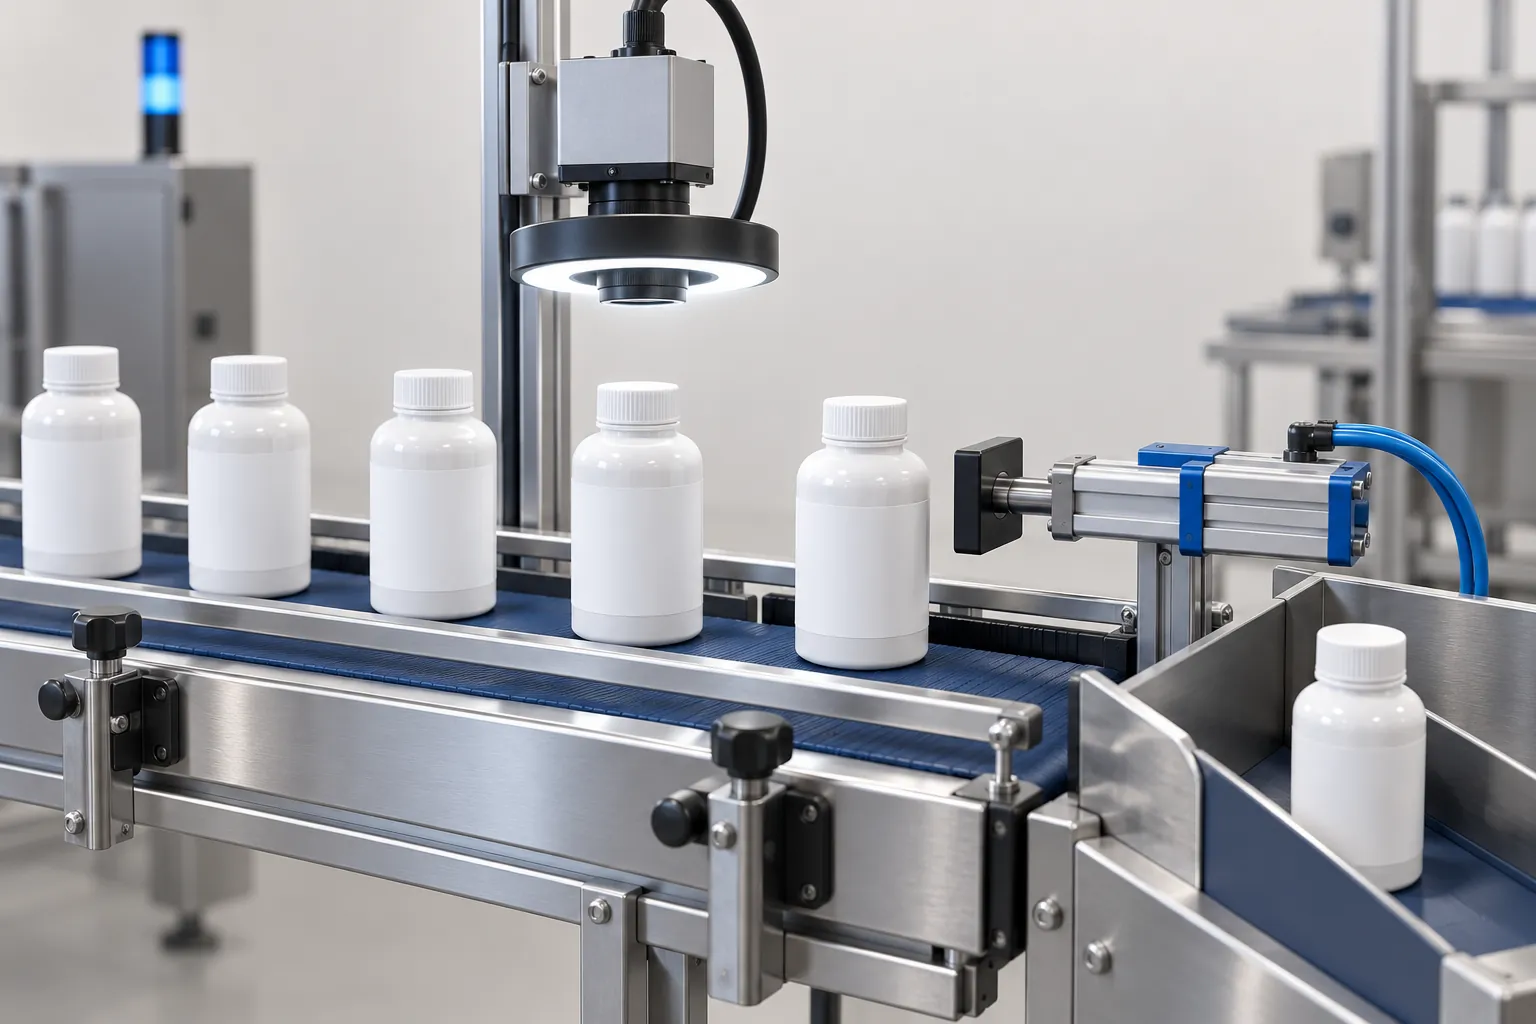
Missed defects can escape inspection, while false rejects waste good packs. Specify a visible feature, representative samples and a confirmed reject path before relying on camera inspection. This guide maps the tasks to their conditions and gives a record for acceptance.
Swipe sideways to see the other columns. The first column stays visible.
| Task | Samples or conditions to agree | Separate check still needed |
|---|---|---|
| Presence or label position | Good, bad and borderline packs; lighting and position limits | Hidden contents or weight |
| Date or lot code | Print variation and expected text source | Barcode grading when a grade is required |
| Barcode | Symbology, sample codes and agreed grading method | Product quality beyond the code |
| Seal appearance | Visible defects and views of the seal area | Seal integrity and strength |
| Color or visible object | Allowed variation and defect samples | Contamination hidden inside the product |
How a vision station works
For a proposed metallic paper finish, the Stahl Senoprint review identifies the job and coating-system evidence to keep separate from inspection results.
A vision station has a few parts that must work together. A trigger sensor tells the system when a product is in position. A camera with a lens captures the image. Lighting shapes the image so features of interest show contrast. A vision controller analyzes the image and gives a result. An encoder can tie position and timing to the conveyor. If the pack fails, a reject device removes it, and a reject confirmation sensor checks that it left the line, usually into a locked reject bin.
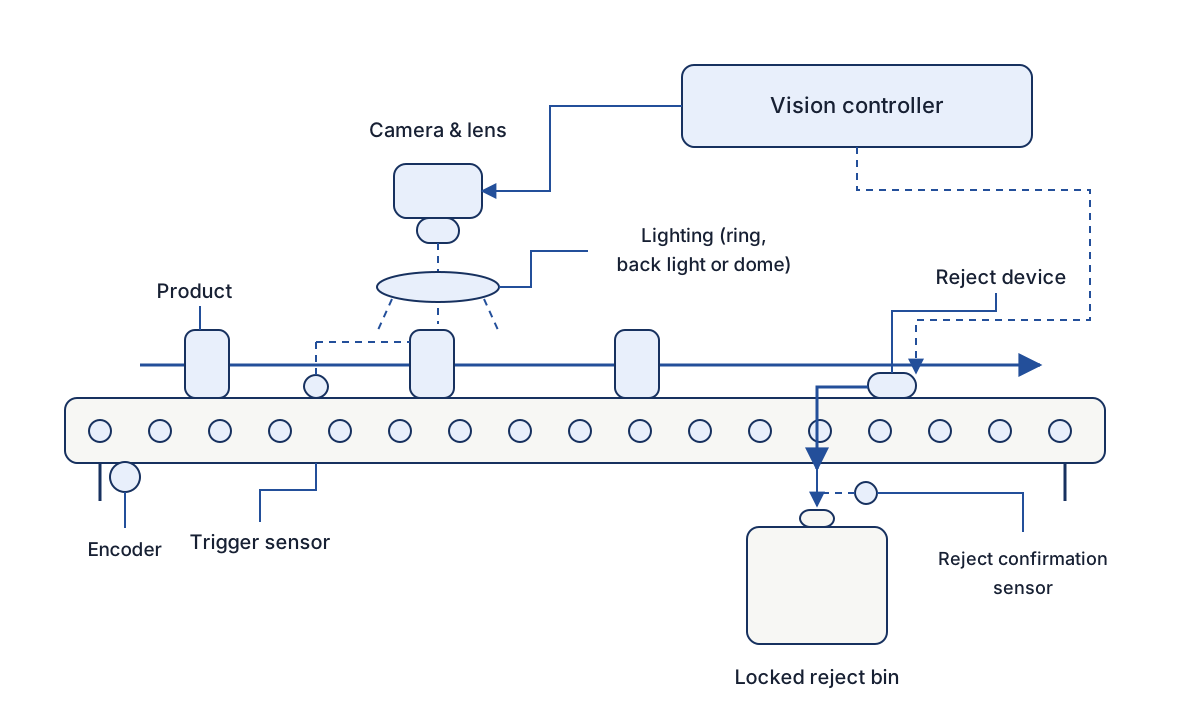
The vision controller reports to the machine PLC, often through discrete signals or a network. The roles of those control elements are explained in the PLC, HMI and motion control guide. Camera and sensor characteristics can be compared using standard methods; EMVA 1288 is a standard for characterizing image sensors and cameras for machine vision.
Three things decide whether the station works in production. The first is lighting and contrast. The camera sees light, not the product, and reflective film, curved surfaces and transparent materials change appearance with the lighting angle, so a ring light, back light or dome light is chosen to suit the feature. The second is presentation: product position, orientation and spacing at the camera must be consistent enough for the program to find the product. The third is timing. The image must be captured at a repeatable point, and the reject must be applied to the right pack after the result is known.
Takeaway: Agree the trigger-to-reject path before comparing cameras.
Camera, lens and resolution: what to confirm
Before a supplier quotes a vision system for quality inspection, three hardware questions decide whether the task is even possible: what kind of processing platform is used, how much of the pack each pixel covers, and whether the lighting has been chosen for this pack surface.
Smart camera or PC-based system
A smart camera puts the image sensor, the processor and the inspection software in one housing. A PC-based system connects one or more cameras to a separate industrial computer that runs the software. Which one suits a station depends on the number of camera views, the amount of processing per image and how results are stored. A single check at one point, such as reading a date code, is often handled by one compact unit; several views of the same pack, or heavy processing such as AI models, may point to a PC-based arrangement. Ask the supplier which platform they propose and why, and what changes if you later add a second camera or a new task.
Working back from the smallest defect
Resolution is a calculation, not a camera label. Divide the width of the field of view by the number of pixels across the sensor and you get the size of pack surface that each pixel covers. As an illustration with assumed values, not a recommendation, a field of view 100 mm wide imaged across 2,000 pixels gives 0.05 mm per pixel.
That figure describes spatial sampling only: how finely the camera samples the pack surface. It does not tell you whether a defect will be detected. A defect that spans too few pixels is unlikely to be found reliably, but a defect that spans many pixels can still be missed if contrast is low, the lighting hides it, the image is out of focus or blurred by motion, or the pack is presented inconsistently. Detection is shown only by testing real defect samples on the station. Give the supplier the size of the smallest defect and the field of view you need, ask how many pixels that defect will cover in their design and what margin they work to, and confirm the answer with challenge samples at acceptance.
Then check the trade-offs. A wider field of view tolerates more variation in pack position but makes each pixel cover more surface. Higher resolution can mean longer image processing time, which has to fit within the time between packs at rated speed.
Lighting and the integration path
Ask for images of your own packs taken under the proposed lighting, including glossy, transparent or curved areas, before the design is fixed. Ask also how the result reaches the machine: which signals go to the PLC, how the reject is timed and how faults are reported. The PLC, HMI and motion control guide explains those roles.
Takeaway: Keep sample images and pixel coverage with the proposed station design.
Where vision stations sit on a packaging line
A packaging inspection vision system is placed where the feature it checks has just been created and can still be seen. Positions vary with the line, but a common arrangement follows the order in which the pack is built.
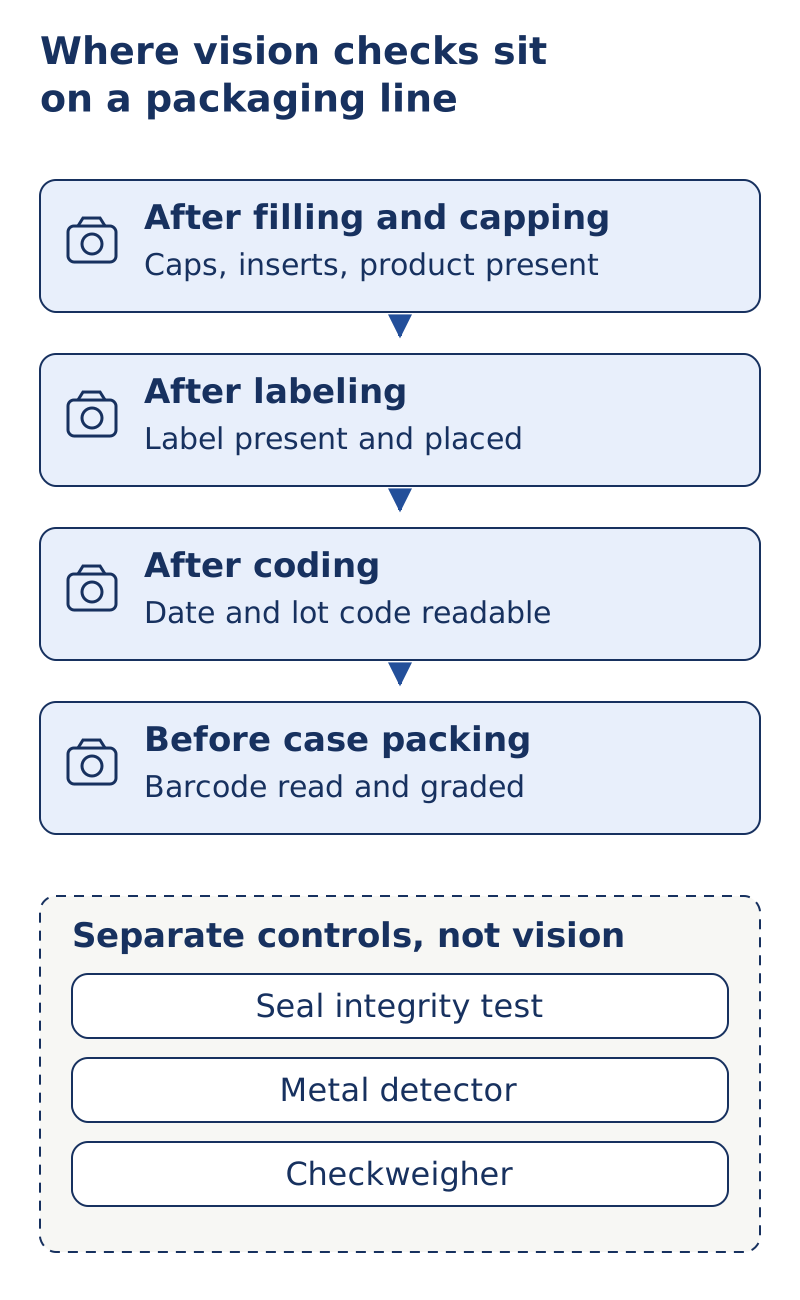
- After filling and capping: presence of caps, inserts or product.
- After labeling: label present, straight and in the right place.
- After coding: date and lot code present and readable.
- Before case packing: barcode readable, and graded where a grade is specified.
Placing the check close to the step that causes the defect makes it easier to trace and correct the cause. Seal integrity, metal contamination and net weight are verified by separate controls, covered under the limits below.
Takeaway: Mark the visible feature and reject location on the layout.
Inspection tasks and what each needs
The table lists common tasks. The right-hand columns show what you should expect to provide or agree with the supplier for each. Whether a task is practical on your line depends on the product, the speed and the quality of the sample set.
Swipe sideways to see the other columns. The first column stays visible.
| Task | What the camera checks | What it needs | Reject handling to confirm |
|---|---|---|---|
| Presence or absence | Whether an item, cap, label, insert or product is there | Good and bad samples; consistent lighting | Which absences stop the line and which reject a pack |
| Label position | Whether a label is present, straight and in the right place | Samples at the edges of acceptable position; defined limits | How a poorly placed label is rejected and how the labeler is notified |
| Date and lot code reading (OCR/OCV) | Whether a printed code is present and readable, and whether it matches the expected text | Print samples, including worst acceptable and unacceptable; expected data source | What happens when the printer and the vision system disagree |
| Barcode reading and grading | Whether a code can be read, and in some systems how well it prints | Sample codes; the symbology and grade method agreed | Rejecting unreadable codes; recording results where needed |
| Seal area appearance | Visible features in the seal area, such as obvious contamination or visible defects | Samples of visible defects; definition of what is visible vs not | Reject path and confirmation; follow-up testing for suspected seal problems |
| Color or foreign-object appearance | Visible color differences or a visible item on the pack | Samples showing allowed variation; defined target and tolerance | Whether a rejected pack is quarantined for review |
Codes and barcodes
For printed codes and barcodes, reading a code is not the same as grading its print quality. Standards such as ISO/IEC 15416 for linear codes and ISO/IEC 15415 for two-dimensional symbols describe print quality evaluation, and GS1 General Specifications give application rules for trade item barcodes. If your customers or retailers specify a grade, state it in the RFQ and ask how the system measures it.
Seal area appearance
A camera can show visible creases in the seal area, product caught in the seal or a misaligned seal. It cannot show whether the seal is sealed through, whether it will resist leaks, or how strong it is. Those properties need other methods. The seal defect investigation guide describes the types of seal defects and how they are investigated, and the standard test methods it draws on include peel and leak tests.
Takeaway: Write one defect definition and reject rule for each selected task.
What each task needs before you can rely on it
Whatever the task, five things need to be defined before a vision station can be commissioned.
- A sample library of good and defective packs, collected across the real variation of product, material, print and lot. A library of perfect packs only gives a system that cannot be tested.
- The station design and light choice, with a record of the settings.
- The rated speed and the product spacing at the camera, so the supplier can check exposure and processing time.
- A written defect definition, with images, of what is a defect and what is acceptable variation. Supplier, quality and production are easier to bring into agreement here than at start-up.
- A defined method to remove a rejected pack, to confirm it was removed, and to keep it from being mixed back into the line.
Assumed example. A food packer wants to check that a date code is present and readable on each pouch. The details are invented for illustration and are not measured or market data. Quality collects a sample set that includes clean prints, light prints, smeared prints, missing codes and codes shifted toward the edge. The team labels each sample as accept or reject and adds a short note on why. The vision supplier uses the set to configure the check and shows results against each labeled sample at FAT. Samples where opinions differ are reviewed and the definition is rewritten. The method is the point: defects are defined before tuning, and the same labeled set is reused to retest after any change.
Takeaway: Approve the labeled sample set before tuning the check.
Rule-based or AI vision: which fits the defect
Most packaging checks can be set up in one of two ways. A rule-based system applies tools that a person configures: find an edge, measure a distance, compare a printed string, read a code. An AI vision inspection system, usually based on deep learning, learns from labeled example images what a good pack and a defect look like. A third approach, often called anomaly detection, is trained only on images of good packs and flags anything that departs from them.
Vision software suppliers describe the split in similar terms. PEKAT VISION, a Datalogic company, writes in a 2026 guide on choosing between the two that rule-based vision suits tasks that can be defined in precise, repeatable rules, such as measuring a component, checking alignment or reading a barcode, and that deep learning is especially useful where products show natural variability (supplier source).
Swipe sideways to see the other columns. The first column stays visible.
| Condition | Rule-based vision fits when… | AI vision fits when… |
|---|---|---|
| Defect definition | The defect can be stated as a measurement or a match, such as a position limit or the expected code text | The defect is recognized by appearance and varies in shape, position or contrast from pack to pack |
| Product and pack | Appearance is consistent from pack to pack | Natural variation is large, so fixed rules would reject good packs or miss bad ones |
| Samples available | Good and borderline samples are enough to set limits | Labeled images of each defect type can be collected, or only good images are available for an anomaly model |
| Explaining a reject | A measured value or a failed match must be shown for each reject | A reject reason shown as a highlighted region is acceptable to quality |
| Changes | Changes are handled by editing a tool or a limit | A retraining and revalidation procedure is in place for new defects, materials or print |
How many samples does AI vision need?
There is no general number. It depends on how much the defect and the acceptable variation differ, on the model and on the image quality. Published research shows how far the figure can move. In a 2019 study on surface-defect detection (Journal of Intelligent Manufacturing), Tabernik and co-authors tested their own segmentation-based deep-learning model on a dataset they built from images of surface cracks on electrical commutators, a non-packaging industrial part. On that dataset and crack-detection task, they reported that the model could learn from approximately 25 to 30 defective training samples, compared with the hundreds or thousands that they describe as usual in deep-learning applications. The figure applies to that dataset, model and task. It is not a minimum or a sufficient number for any other application, it does not predict detection performance on a packaging line, and it does not tell you what a packaging task needs.
What carries over is the method. Ask the supplier how many labeled images per defect type they used, how the good images cover real variation across lots, film batches and shifts, and which images were held back from training and used only for testing. A model that is tested on the same images it was trained on has not been tested.
A new model version changes the inspection: record it and retest the affected tasks, as with a program change. The physical limits are collected below.
Takeaway: Choose the method against held-out defect samples, not a generic image count.
Defining detection performance before acceptance
Detection performance is only meaningful against a labeled challenge set and a written counting rule. Use one copy of this blank record per defect class and test run. Sample counts and pass limits come from the agreed quality plan, not this guide.
Swipe sideways to see the other columns. The first column stays visible.
| Acceptance field | Agreed input or observed result |
|---|---|
| Defect class and labeled sample-set ID | |
| Defective / good / borderline sample counts | |
| Counting rule, pass limit and borderline approver | |
| Missed defects (defective packs passed) | |
| False rejects (good packs rejected) | |
| Speed, pack spacing, material and lighting settings | |
| Program / model version and test date | |
| FAT / SAT stage and reject-confirmation evidence | |
| Retest trigger: software, lighting, lens, model or material change |
Write the acceptance figures into the order from your own quality requirement; this guide does not suggest values. The FAT vs. SAT guide explains how to split tests between the two.
Takeaway: Sign the counting rule and preserve the results for each version.
Limits of vision inspection
These physical limits apply to rule-based and AI inspection alike.
A camera checks visible features only. If a defect cannot be seen from the camera’s viewpoint, lighting and resolution, the system cannot detect it, and hidden features such as what is inside an opaque pack are out of reach.
It does not replace seal-integrity testing. A seal can look acceptable and still leak or open, and a seal that looks irregular can be sound, so seal integrity is verified with test methods suited to the package and product.
It does not replace metal detection either. A camera does not find metal contamination inside a product, and metal detection is a separate technology with its own aperture, sensitivity setup and reject logic. The checkweigher vs. metal detector guide explains what each device does.
Nor does it replace weight checks. A picture of a pack does not give its net content. A checkweigher or another suited method verifies weight, and the net quantity rules depend on your market and product.
The system also depends on its sample library, because it detects only what it has been taught or configured to detect. New defect types, new materials and print changes can need re-validation. And results drift with the environment: dirt on the lens, light aging, vibration and changed product appearance can all change them.
Vision is one part of a quality system. Your hazard analysis and quality plan decide whether it is the right control for a hazard, not the vendor. To compare that task with weight, contamination and leak checks, use the packaging inspection equipment overview before allocating stations on the line.
Takeaway: Keep separate controls for hazards the camera cannot inspect.
Information to request from suppliers
- A station description: camera, lens, lighting type, mounting, enclosure and trigger method.
- The tasks the station performs, with the defect definitions the supplier assumed.
- The sample set the supplier used for setup and the one they ask you to provide.
- Lighting and optics settings, kept as a record.
- Software version, backup copy of the program, and how settings are protected from unauthorized change.
- Result data: which pass and fail counts and images are stored, and how they are exported.
- Behavior on camera failure, communication loss and loss of the reject device.
- The reject path: the device, the confirmation sensor, the bin and its lock arrangement.
- Cleaning and calibration procedure and the recommended check frequency.
- What the station does not check, stated in the supplier’s own words.
- For AI vision: the number of labeled images per defect type used for training, the separate test set, the retraining procedure and who approves a new model version.
- The pixel size on the pack and the number of pixels covering the smallest defect you specified.
Checklist for planning a vision task
- The inspection task and its purpose are written down, with the hazard or quality risk it addresses.
- A defect definition with images exists and is agreed by quality, production and the supplier.
- A sample library with good, borderline and defective packs has been collected.
- Rated speed, pack spacing and orientation at the camera are specified.
- Lighting suits the pack surface, including film gloss or transparency.
- Reject method, reject confirmation and locked reject bin are specified.
- Interface signals to the machine and the line are listed in the line interface checklist.
- Settings access and change control are defined.
- A routine check using known good and known bad samples is planned.
- Other controls for seals, metal and weight are identified and not assumed to be covered by vision.
- The choice between rule-based and AI vision is justified by the defect, the samples and the need to explain rejects.
- Missed-defect and false-reject counting rules are agreed before FAT.
Limits and on-site verification
This guide cannot say whether a given task is feasible. Feasibility depends on your product, packaging material, speed, print method and layout, and the only dependable way to find out is to run your own samples on the intended station.
Plan these checks with real product and materials:
- A run of known good and known bad samples through the station at line speed, with results compared to the labeled set.
- A run with natural variation, such as different lots, different film batches and the changes that occur through a shift.
- Reject tests, confirming that each rejected pack leaves the line and lands in the locked bin.
- Behavior under fault conditions: missing trigger, camera failure and full reject bin.
Run these checks at the factory and on site as part of acceptance; the FAT vs. SAT guide explains how to split them. Reject devices move packs at line speed, and access to the station and the reject path belongs to the machine risk assessment (ISO 12100 gives the general method), with review by qualified personnel. This guide makes no claim about the results any station will achieve.
Source details
Sources reviewed 8 October 2026; the task table and acceptance record are editorial planning aids, not performance specifications.
- PEKAT VISION, Machine Vision Q&A: Choosing Between Deep Learning and Rule-Based Inspection (5 March 2026), manufacturer’s public guide. Supports the stated distinction between repeatable rules and variable appearance; its examples are supplier statements, not our tests.
- D. Tabernik, S. Šela, J. Skvarč and D. Skočaj, Segmentation-Based Deep-Learning Approach for Surface-Defect Detection (2019), authors’ paper on arXiv, subsequently published in Journal of Intelligent Manufacturing. Its approximately 25–30 defective training samples concern their model and electrical-commutator crack dataset only; they set no packaging-line minimum or acceptance guarantee.
References
- ISO/IEC 15416:2025 — Automatic identification and data capture techniques — Bar code print quality test specification — Linear symbols — ISO/IEC
- ISO/IEC 15415:2024 — Automatic identification and data capture techniques — Bar code symbol print quality test specification — Two-dimensional symbols — ISO/IEC
- GS1 General Specifications (Release 26.0, January 2026) — GS1
- EMVA Standard 1288 — Standard for Characterization of Image Sensors and Cameras, Release 4.0 (Linear and General modules) — EMVA
- ISO 12100:2010 — Safety of machinery — General principles for design — Risk assessment and risk reduction — ISO
Update history
- : First published.
- : Added sections on camera and resolution choices, where vision stations sit on a packaging line, rule-based versus AI vision, and how to define detection performance at acceptance.
- : Moved task conditions to a quick table, added an acceptance record and source details, consolidated limits, and redrew the station diagram for mobile reading.
Next steps
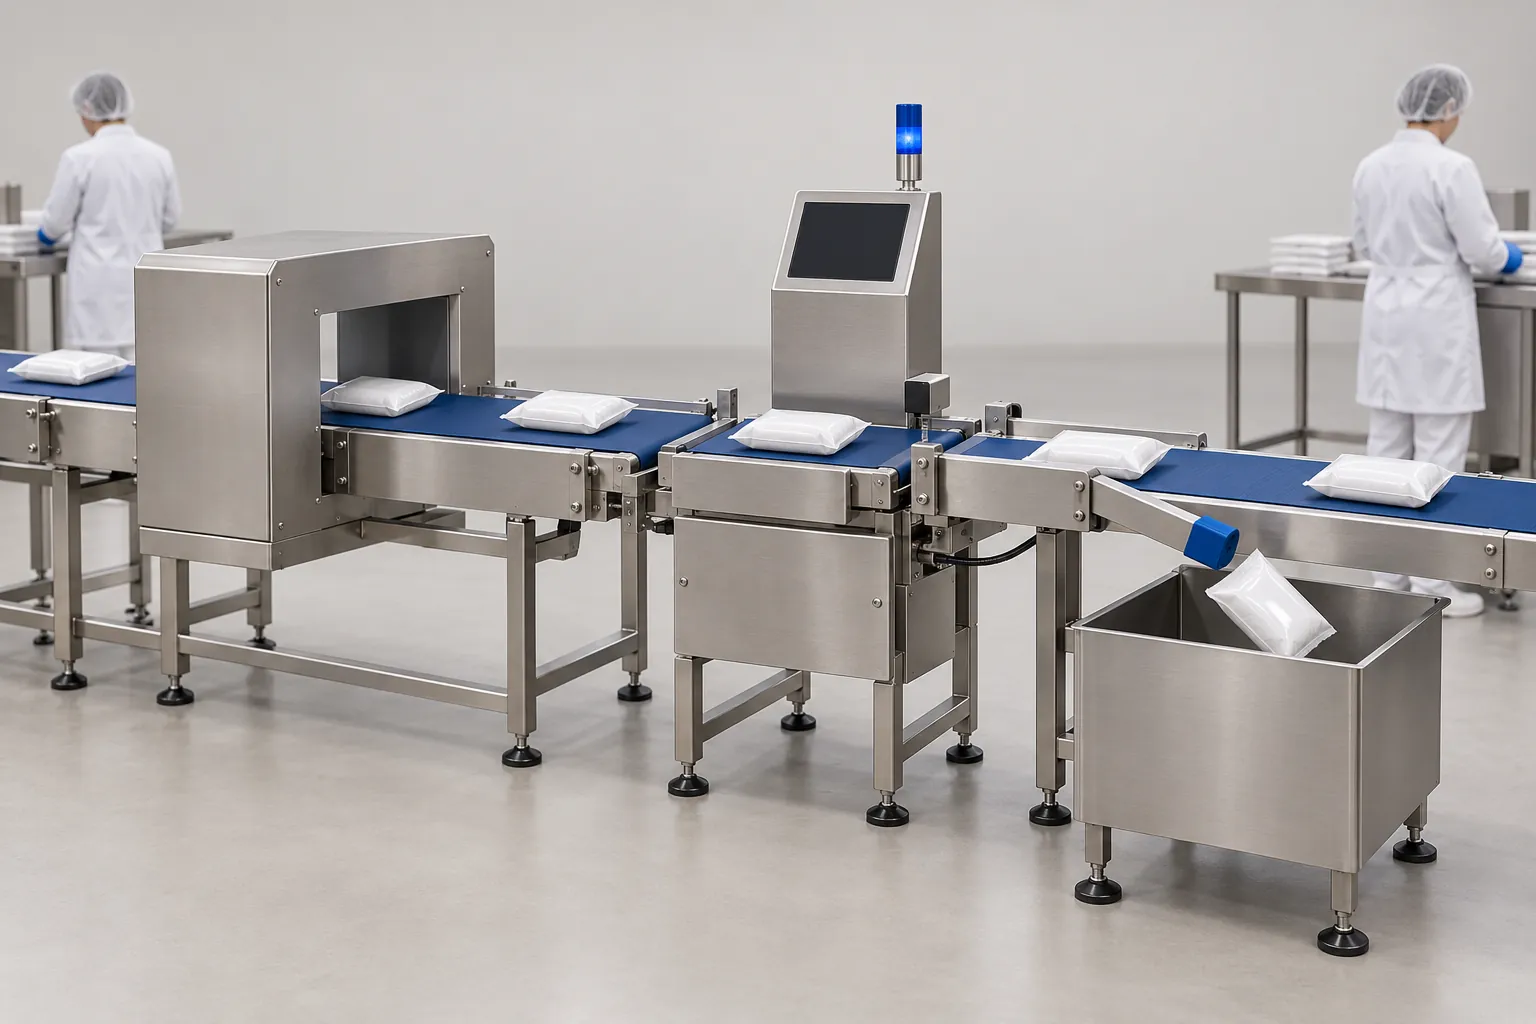
Checkweighers vs. Metal Detectors: Different Inspection Jobs
A checkweigher verifies package weight and a metal detector controls metal contamination. See why one cannot replace the other and how to plan rejects and records.
Read guide
Packaging Seal Defects: An Evidence-Based Investigation Checklist
Investigate packaging seal defects by containing suspect product, collecting evidence, testing with agreed methods and changing one variable at a time.
Read guide
FAT vs. SAT for Packaging Equipment: Defining Acceptance Criteria
Compare factory and site acceptance tests for packaging machines, and learn how to write acceptance criteria that both buyer and supplier can verify.
Read guide